
Forms can do so many things, from event registrations and information requests, to payment collection for tickets and other items for sale. Forms help streamline the process of collecting information, which makes communication and event management easy for you and members of your community. Once a member submits any form that includes their payment information, they will now get a receipt emailed straight to their inbox.
Examples & Inspiration
-
Create a prayer request form
-
Create a connection card form
-
Create a volunteer interest form
-
Create a retreat registration form
-
Collect payments for books
-
Collect payments for special events
Create a Form
To create a form, go to the Forms tab in the portal. Click the Create New Form button, enter the title of your new form in the Form Title field, and click the Create button.
After you have created your form, you can customize it by selecting different fields on the left-hand side of your screen:
Click any of these options, and an element of that type appears at the bottom of the Form on the right-hand side.
-
Read Only Form Elements:
-
Headline Text: Large text used to display a title or headings in your form.
-
Spacer: Add space between sections of your form.
- Page Break: Adds additional pages to your form. The viewer can click Next or Back to move from page to page
-
Paragraph: Block of descriptive text to add context. You can also add an image using HTML; as described below.
-
Image by URL: Embed an image hosted elsewhere on the web by its URL, as described below.
-
Image Upload: Add an Image by uploading a .jpg, .bmp, or .png, as described below.
-
-
Interactive Elements:
-
Short Text Response: A blank single-line field that allows the user to give a short answer. Great for something like "When's your birthday?"
-
Long Text Response: A blank paragraph field that allows the user to give a longer response. Great for something like "Tell us more about yourself."
-
Checkbox List: Creates a list of options that allows the user to select one or more options.
-
Dropdown List: Creates a dropdown list that allows the user to select exactly one option.
-
Single Option Selector: Creates a list of options that allows the user to select only one option.
-
Profile: Requests basic contact information from the user.
-
This creates a profile in the system if one doesn't already exist. The portal uses the contact info to send an emailed receipt when the user submits the form.
-
Once you have added the Profile field to the form, you can click the Link Tags button to associate the profile with a tag when you submit the Form. Learn more about creating tags and how they are used in this article.
-
You can add this element only once to a Form.
- The Form Builder adds this section automatically whenever you select a Payment element.
-
-
- Payment Elements:
- Defined $ Amount: Add an item description, price, and other details for specific items.
- Any $ Amount: Add an open amount field where the user can specify any amount between $1 and $100,000.
- *Note: These elements can only be used if you are using the FACTS payment processor. Also, both payment elements require a profile section on the form, which the Form Builder adds automatically.
Here is a sample form that uses most of these elements:
Once you add an element to a form, you can modify it. Click the three dots menu in the top right-hand corner of the element to open the Action menu.
-
Move Up: swap the position of this element and the one immediately above it.
-
Move Down: swap the position of this element and the one immediately below it.
-
Make Required or Make Optional: where possible, change whether the element is required or optional.
-
Payment or Profile elements, if present in a form, are always required.
-
Not applicable to Read-only elements.
-
-
Duplicate: create an identical copy of this element and place it immediately below this element.
-
You can then move or edit the copy independently of the original.
-
You may not duplicate a Payment or Profile element.
-
-
Delete: remove the element from the Form
Once you have created your form, don’t forget to click the Save button at the top of the tab.
Add Images to a Form
Accepted file types for images are:
-
.JPEG or .JPG
-
.PNG
-
.BMP
Images wider than 620px across will be automatically resized to span the entire width of the form.
You can add an image to a form in any of the following ways:
-
Image upload: In the form editor, you can upload an image directly from your device. The portal generates a URL once the image is added. The image will be centered on the form.
-
Click Image Upload to add this field to the form.
-
Click Choose File and select the image file, then click the Open button.
-
The image appears as a new image URL in the Image Upload field.
-
Click the Save button.
-
Click the View button to see a preview of the form with the image in place.
-
-
Image by URL: In the form editor, you can add the URL of any image that does not have copyright restrictions. The image will be centered on the form.
-
Click Image by URL to add this field to the form.
-
Paste the URL for the image.
-
Click the Save button.
-
Click the View button to see a preview of the form with the image in place.
-
-
Image using the Paragraph field: Paragraph fields accept HTML, so this is a good option if an image requires custom sizing (such as half of the form width), is to be left-aligned or right-aligned, or uses other HTML attributes.
-
HTML format example for a photo:
<img src="URL" style="width:100%"> -
Simply copy and paste this into the Paragraph field and include the URL for the photo that you want to include in the form between the first set of double quote marks. For example:
<img src="https://d3oeq6z5d8uq8l.cloudfront.net/wp-content/uploads/2019/03/08144003/group_mens.png" style="width:100%"> -
Add other HTML attributes as needed.
-
Add a Hyperlink to a Form
-
Use the Paragraph element to include a link to an outside source in your form. The HTML format for a hyperlink is:
<a href="insert link to desired location" target="_blank">Title of desired location</a>
-
For example, here is the hyperlink to insert Google.com with the title Google Search Engine:
<a href="https://google.com" target="_blank">Google Search Engine</a>
-
For example, here is the hyperlink to insert Habitat for Humanity with the title Habitat for Humanity:
<a href="https://www.habitat.org “target="_blank">Habitat for Humanity<a>
Move Elements within a Form
To the left of most elements is the drag-and-drop tool.
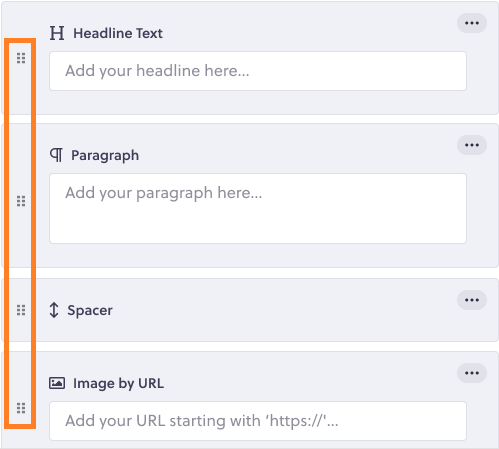
You can move an element to a different place within the form. Click and hold the drag-and-drop tool to pick up the element. Move up or down to the place where you want to put the element, then release the mouse button.
When a Payment Setup element exists in a form, it must be located at the bottom, and it cannot be moved.
Payment Elements
If your organization is using the FACTS payment processor, you can put Payment elements in your Forms. When they fill out the Form, your Users can enter payment information for things like event registrations, tickets or other items for sale, or even open donations.
Select one or more Payment Elements with a Defined $ Amount or Any $ Amount from the menu on the left of the Form Builder screen:
This also automatically adds a Profile section and a Payment Setup section to the bottom of the Form.
Defined $ Amount:
This payment element lets you enter one or more items, such as event registrations, T-shirts, books, or tickets, and their prices.
- Item Name: Enter the Description of the item as you would like it to appear on the form
- Price: Enter the Price of the item as you would like it to appear on the form
- Quantity Rules: You can set quantity rules for your payment element. To enter minimum and maximum quantities of any item, select the box next to Set specific quantity rules for this item.
Select a minimum and/or maximum for purchases per item required for each submission.
You can choose which items you would like to set quantity rules for and leave others unspecified.
Here is an example of the User view for the Defined $ Amount element on the form:
Any $ Amount:
You can also offer donors an open amount field where any amount between $1 and $1million can be specified. This element can be designated as required or optional via the ellipses on the right. To make a required Any $ Amount element optional, select the ellipses.
Select Make Optional from the drop-down menu.
The tag in the top-right corner will change from Required to Optional.
Follow the same steps to set an optional Any $ Amount element to be required.
This element also lets you create a customized description (260 char max) that will appear beside the option on the form. If you donot enter a Description in the form setup, the default value of “Support <fund name>” appears on the user form, to show the name of the fund to which to apply donations.
Here is an example of the User view for the Any $ Amount element on the form :
Payment Setup
Use the drop-down menus shown below to select the Campus, the Fund, and the default payment type for the elements in the form.
Forms accept Credit, debit, and ACH payments. Donors simply toggle between the Card and Bank Account tabs to select a payment method.
You also have the option to ask donors to cover the processing fee! Contact communitysupport@factsmgt.com to enable or disable this option. Should you choose to ask the Donor to cover the processing fees, a checkbox will appear within the secure payment section prompting the donor to cover fees. This added charge will be reflected on the donor’s giving receipt.
Create a Custom Response
You can customize the response a User receives when they submit a form. This custom response can even include helpful links to other resources!
While editing a Form, click the Customize Response button in the upper right-hand corner.
The portal opens the Custom Form Response window.
Into the Custom Message field, enter the custom messaging you would like to display on the form response, then click the Save button.
The user will see the custom message after submitting their response to the respective form.
If the form has a payment element and there is no custom message set up for the form, but there is a custom message associated to the fund, then the app displays the custom message of the associated fund. If there is no custom message for either, then the app displays nothing on the form response.
The User can click the View My Submission button in the app to see a read-only version of the submitted Form, which includes the custom text and the form responses that the User entered.
If you have any questions or need help, send us a note at communitysupport@factsmgt.com!
Comments
0 comments
Article is closed for comments.