
Manage your forms once they've been created. You can enable, disable, sort, search through, edit, delete, duplicate, view, and copy forms. You can also edit any form to set up notifications, submission limits, and profile tagging capabilities.
Sort the Forms List
Once you create a form, it is visible on the Forms List page. Click the sort arrows next to any column name to sort the list in ascending or descending order for that specific column.

Search for a Specific Form
You can also use the search bar at the top of the list to search for a specific form. In the search bar, type in any word that is part of the form name, and the list filters itself.

Actions Menu
On the far right-hand side of the page, the Forms List offers an Actions menu for each form. Click on the ellipsis button to open the Actions menu.
Edit
Select the Edit option to change the form.
Delete
Select the Delete option to remove a form from the list. The form is no longer available.
Duplicate
You can use an existing form as a template for other forms instead of having to start each new form from scratch.
Select the Duplicate option to make an exact copy of the form. The copy appears in the Forms List immediately under the original, with the word “COPY” appended to the name.

You may edit the copy, change its name, and change all its other fields, independently of the original.
View Public Form
Select the View Public Form option to show a preview of the form as it will appear in your app and online.
Copy Public Link
Select the Copy Public Link to copy the link to your computer’s clipboard. You may then paste the link into another place in the application, to a website, or into a social media post.

Download Responses
Select the Download Responses option to download a CSV file that shows user responses to the form. This example shows four responses to a form that asked for messages to the church office.

The columns and contents of the CSV file vary, depending on the fields in the form.
View Responses
Select the View Responses option to open the Responses tab, which lists the responses to the form. The most recent response appears at the top of the list.
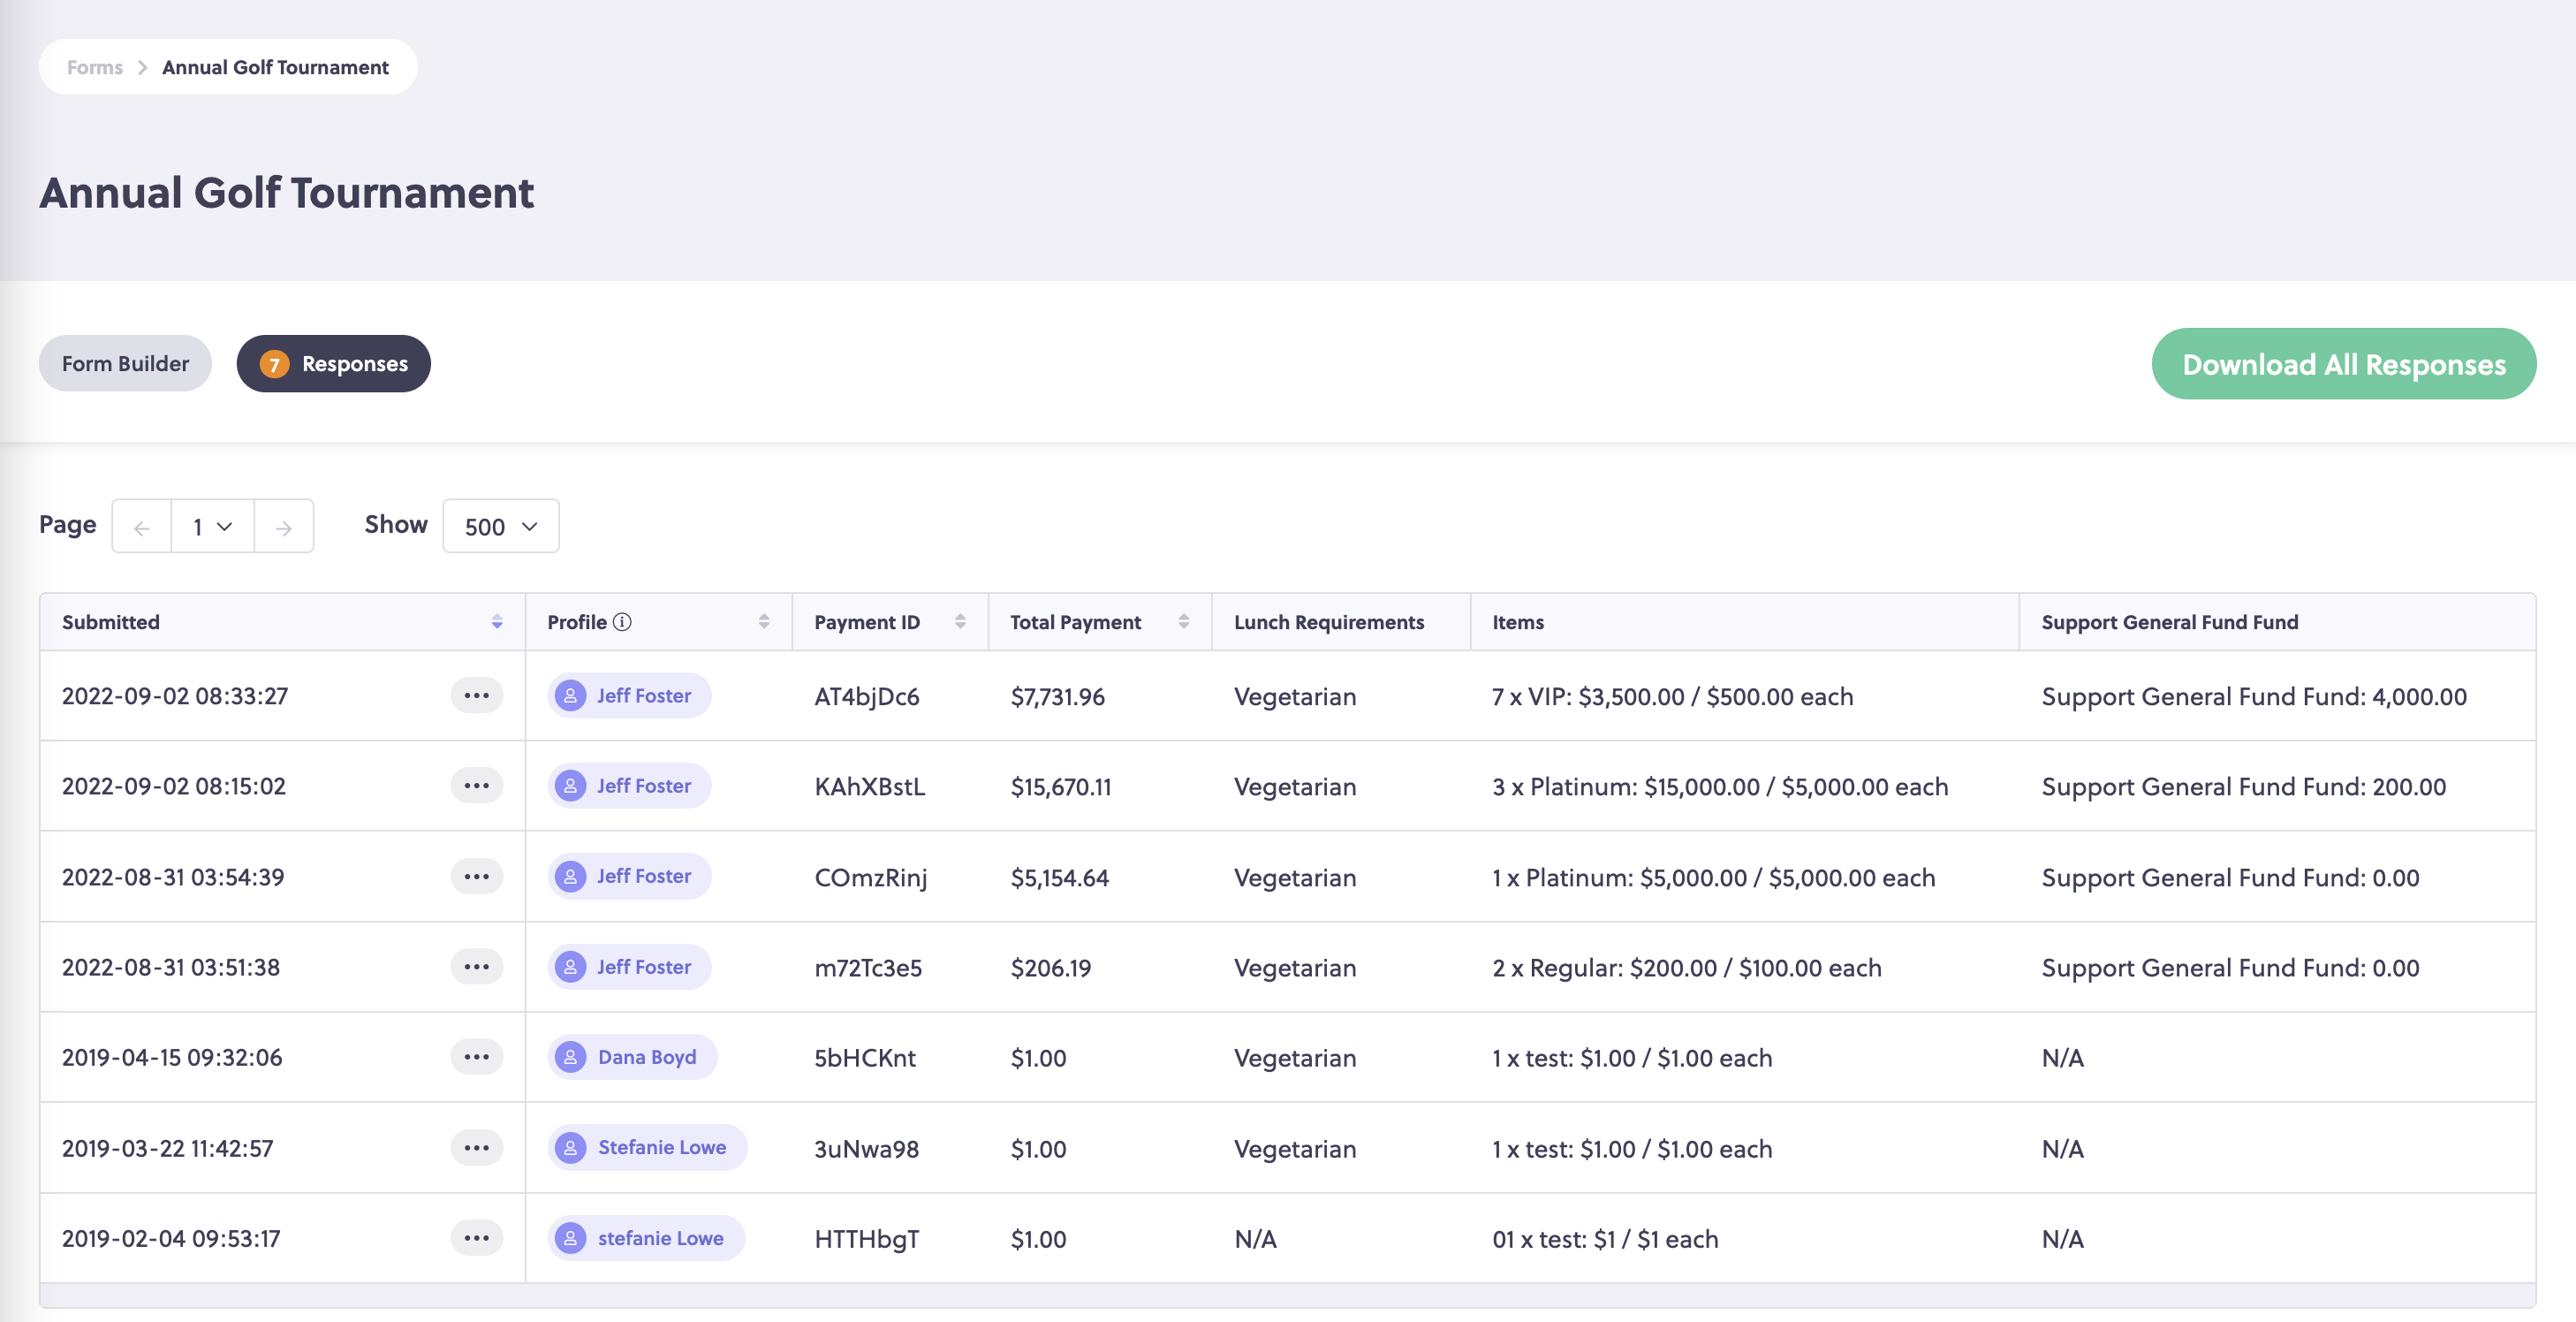
Each row shows the information that the user entered into the form. The columns of the response table show a column for every element on the form, in the same order as they appear on the form.
To view one response as it appears on the form, open the Actions menu for the response, and select the View Response option. The response appears in a separate tab as it appeared on the form.
If you want to download the responses, click the Download All Responses button in the upper right-hand corner. The system downloads a CSV file into the Downloads folder on your computer. The file shows a column for every field in the form, in the same order as the elements on the form.
Add Smart Forms to Your App and Share on the Web
If you have a mobile app, you can add forms to the app.
Once you have created a form on the Forms Page, and the form appears in the Form List tab, click the ellipsis menu on the far right-hand edge of the form to open the Actions menu. Select the Copy Public Link option.
This copies the link to your computer’s clipboard. You may then paste the link into another place in the application, to a website, or into a social media post.
More information about links is available here.
Enable and Disable Forms
When you no longer want a form to be active, but you don't want to delete it, you can disable it.
On the Forms List page, to the left of the form’s name, click the on-off switch to move it from the right (the switch is green and the form is active) to the left (the switch is grey and the form is inactive).

The form will no longer be available online or in-app.
To enable a form again, click the on-off switch to move it to the active position.
If the list of Campuses and Funds changes, so that an inactive Form no longer has a valid combination of Campus and Fund, you must edit the Form before you can reactivate it.
Form-Response Indicators
On the right-hand side of the page, the Forms List shows the number of responses and the date of the last response for each form.

Notifications
If you want to be notified of form activity, you can set yourself up to receive text and email alerts when a member fills out a form.
Common uses for notifications are:
-
Immediate Prayer: Send prayer requests straight to the phones of each prayer team member.
-
Urgent Care: Notify the pastor of immediate needs.
-
Final Call: Receive notification of last-minute registrants, so you don't come up short for event seats, T-shirt orders, or the like.
While editing a form, in the Settings area of the lower left-hand corner, hover over either the Email Notification link or the Text Notification link. When the green + button appears, click it to open a field and type the email address or the phone number.
You may click the green + button again to add as many additional email addresses or phone numbers as you like.

To remove a notification, hover over an email address or phone number. The trash can icon appears to the right. Click it to delete the notification.
Form Submission Limits
You can set a limit on the total number of form submissions that you want to receive.
This is a great setting to use when you have a volunteer event where only a certain number of volunteers can participate.
While editing a form, in the Settings area of the lower left-hand corner, click in the Max Number of submissions allowed field, then enter the number.

Once you have received this number of submitted forms, the portal will not allow any additional Users to submit the form. The Users receive a message stating that the form has reached the max number of submissions:
Tag a Profile and Communication
Tagging a profile through a form sets the stage for you to enhance communication with your volunteer group. With tags, you can make sure the right group of people are getting the right information by sending push messages or text messages to your members whose Profile has a specific tag.
Tags are also how you create chat groups. If a tag you used in a form is chat-enabled, people who have that tag will be able to chat with the group in real time. Chatting allows you to provide instant updates to your group, as well as, for example, to ask for extra supplies that are needed at your upcoming volunteer event.

To tag a profile within a form, simply add the profile section to your form. Once you have added the profile section, click on the +Add Tag button to see a full list of all the tags you have created.

Check the boxes of the tags you would like to associate with the profiles of the users who submit this form, the click the Done button.
Now, when individuals complete this form, the portal tags their profiles with the associated tags.
You can automatically tag a Profile-enabled form. For example, if you are collecting registrations for a volunteer event using a form, you can create a tag for that volunteer event and add the tag to the form. The portal automatically adds the tag to the profiles of any Users who fill out the form. You can then use tags to send messages to those members using push or text. Read more about how tags work across the platform here.
If you have any questions or need help, send us a note at communitysupport@factsmgt.com!
Comments
0 comments
Please sign in to leave a comment.