
Funds are available for donors to select when they are giving. Funds can be created for any purpose, but some examples of different funds you might create are:
-
General Fund
-
Building Fund
-
Scholarship Fund
-
Missions Fund
*Note: Manage Funds options are only available for funds managed by the Impact platform. If your organization uses CCB or PCO giving integration to manage your funds, please visit CCB or PCO to manage your funds and fund settings.
Create a Fund
To create a fund, go to Giving > Funds in your portal.
Type the name of your new fund in the box, then click the + Add Fund button. The fund appears at the bottom of the list of existing funds.
Reorder Funds
Funds appear in the list in the order in which you create them, with the first fund created at the top and the most recently created at the bottom. Up to 100 funds can display on a single page. When you have 100 or fewer funds, you can rearrange the order in which the funds appear. Click the fund’s drag-and-drop icon on the left-hand side of the screen. Simply drag and drop the fund in its new order in the list.
Custom ID
The Custom ID column is for ParishSOFT reporting. For more information, visit ParishSOFT Export.
Fund Name
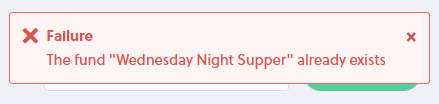
You can edit a fund name at any time. Click in the field under the Fund Name column, then type the new name. Every fund must have a unique name. You cannot re-use the name of a deleted fund.
Fund Description
A fund description is an optional way to give some more context about the fund. You can enter up to 140 characters to describe the purpose of the fund. The fund description appears alongside the fund name when a donor goes through the process of donating online or through the mobile app.
Tax-Deductible & Non-Tax-Deductible Funds
By default, your funds will be set to tax-deductible. To change any fund to be non-deductible, click the radio button under the Non-Deductible column.
Multi-Campus Funds
If you have more than one campus, you can enable a particular fund for a single campus, or for any number of your campuses. To enable a fund for a campus or campuses, check the box under each campus. Funds which have not been enabled for any campuses will not be available for donors to select.
If you clear the checkbox for a campus, that disassociates the fund from the campus. You can only disassociate a fund from a campus if the fund has no appeals, forms, or recurring donations associated with it. You must first cancel, delete, or associate these items with another Fund.
Delete a Fund
To delete a fund, click the trash can icon on the right-hand side. The system asks you to confirm that you want to delete the fund.
Once you have deleted a fund, it no longer appears in the list. However, if you try to create a new fund with the same name as a deleted fund, the system will not allow you to do so.
You can only delete a fund if the fund has no transactions, appeals, recurring donations, pledges, or Forms associated with it. You must first cancel, delete, or associate these items with another fund.
Save Changes
To save the changes you have made to a fund name or fund description, click outside of the fund row. You will see an Update Successful message in the top right-hand corner of your screen, letting you know your changes have been saved.
Make Funds Available to Donors
To set Funds from which donors can select when donating online or via Text-to-Give, click the Manage Donor Experience button at the top of the Funds list page. The Donor Experience page has a section called Funds.
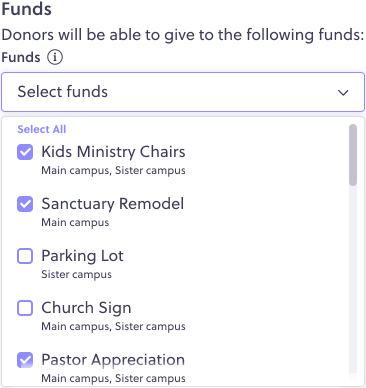
Click on the Funds dropdown, then check the checkbox for each fund that is to appear to donors. When finished, click the Save button at the top of the page.
When no funds have been checked, you will see a warning below the fund selection indicating no funds have been selected for donors to support.
*Note: Learn how to filter donations by funds on the Transactions page.
If you have any questions or need help, send us a note at communitysupport@factsmgt.com!
Comments
0 comments
Article is closed for comments.