
Use the power of Calendars and Events to streamline your workflow and keep your community in the know!
You have the ability to create your own calendar - all within the FACTS platform. You can also make certain calendars exclusively available to segmented groups by linking tags (available with version 29.2.0 and later), adding registration links, and including all your event details (including a photo!).
*Note: Skip to the bottom of this page to watch a step-by-step walk-through video of this feature.
Access Calendars
Go to the App > Calendar page in your portal.
Click CREATE CALENDAR to add or link your first calendar. You can create a calendar from scratch, or pull in existing calendars from other sources (like Google, Outlook, and others) with an .ICS or iCal feed.
Create a New Calendar
To create a new calendar, choose NEW CALENDAR.
Add a title for the calendar and select whether it’s public or linked. Public means it will be available to everyone. Linked means you can have this calendar available for a certain segmented group. These groups are segmented by tags. Read more about tags in the Power of Tags article.
*Note: Tagged calendars are available with version 29.2.0 and later.
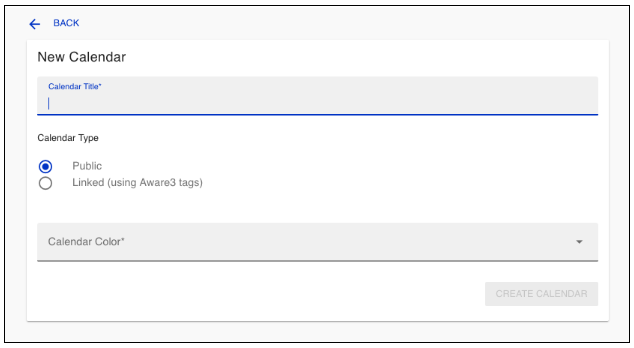
For a linked calendar, click inside the gray box under FACTS Tags or the Link Tags button, and the list of tags you’ve created will come up. A pop-up will appear. Check all the tags you want to link to this calendar and click DONE.

Now, select a calendar visual identification color. Then click the CREATE CALENDAR button.
Add an External Calendar
If you’d like to pull in an existing calendar with an iCal or .ICS feed, click CREATE CALENDAR from the main Events page, then click the USE EXTERNAL instead. This will allow you to add a feed link.
Title this calendar, add the calendar type & color, then click the CREATE CALANDAR button. Keep in mind that with an external calendar, you cannot edit an event in the portal and will want to edit it within the calendar provider.
Edit and Delete Your Calendar
To edit a calendar once it’s created, click the pencil icon next to the calendar name on the main Events page.
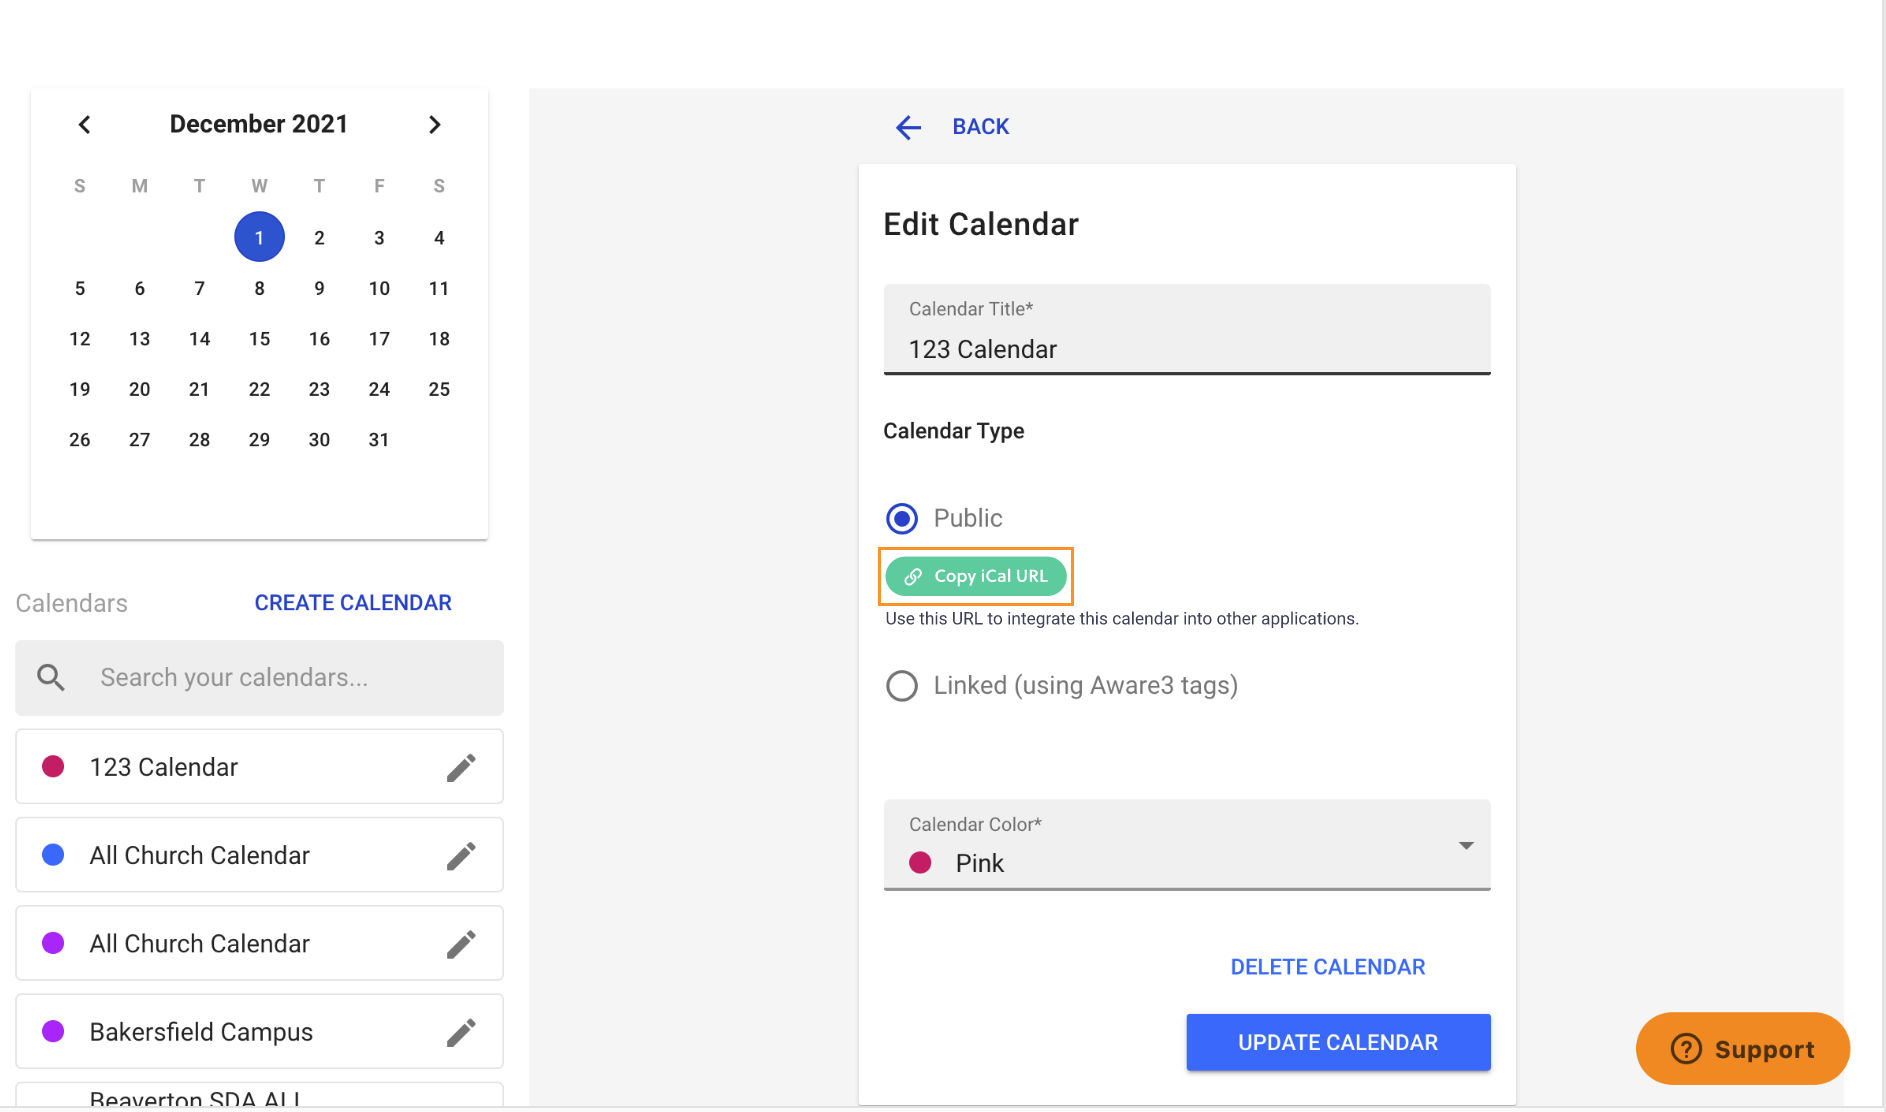
Within the Edit Calendar panel, you can change any details: Title, Calendar Type, FACTS Tags, and Calendar Color. This is also where you will delete a calendar.

Create an Event
Once you’ve created a calendar, it’s time to create an event. Click CREATE EVENT at the top of the screen to get started.
Click the Add Image circle to add an image. A pop-up will appear, and you can select an image and crop it. If you need to edit it, just hover over the image and click the pencil.
Next, fill out the event details.
- Add an event name and description (description is optional, but it's great to give more details!).
*Note: URLs in the description field are supported in version 35.10.0 or higher! Feel free to add a link using this format as an example: https://google.com. Your link will show up as a clickable URL in-app. - Select the calendar you want this event to be part of by selecting from the Calendar drop-down.
- If it's an all-day event, toggle on All Day Event, then select your start and end date.
- If it's not an all-day event, select your date and start and end times.
*Note: Calendar events display in the user’s timezone. For example, if your calendar is in CST, but the user is in EST, then your calendar will display in EST when the user views the calendar in the app. - If it's a recurring event, select a recurrence from the drop-down (optional).
- Add your Location (physical address), Location Details (any additional details like room #, etc.).
- Add a registration link (optional). Add a FACTS form or another link. Learn more about forms in the Creating Forms article.
Now, click Create Event. The event will live on your main page, which includes all of your events from all of your calendars.
Edit an Event
To edit an event once it’s created, find the event in the All Events list and hover over the event. An edit and delete icon will appear. To edit, click the pencil icon and change any details you want.
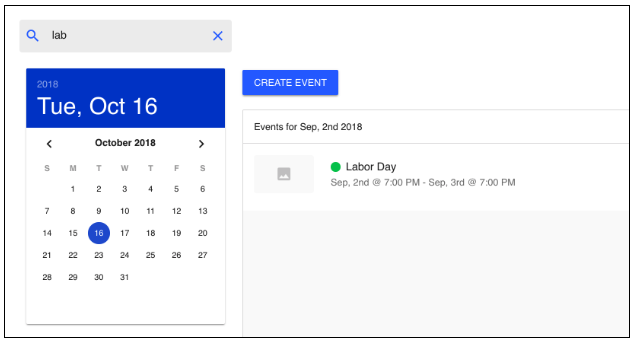
Search for an Event or Calendar
To search for a specific event, use the Search all events box at the top of the screen.
As soon as you start typing a search term, the list will begin to filter in real time.
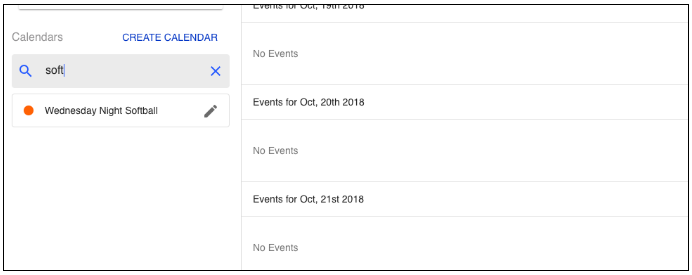
You can also search all your calendars. Type in the Search your calendars box under Calendars on the left panel.
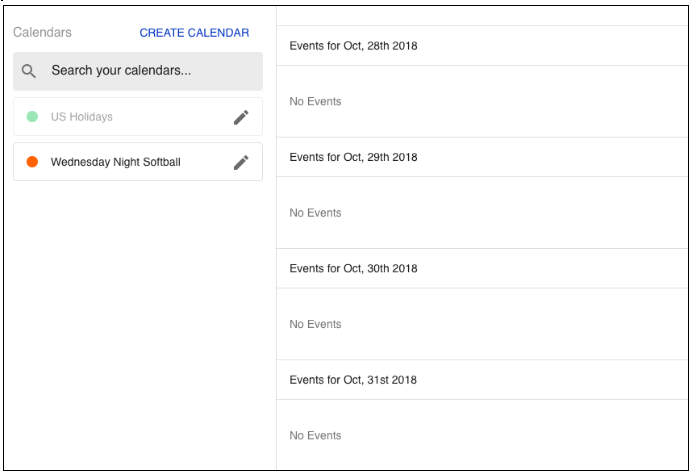
You can also filter a calendar as visible or invisible in the list. Click the calendar name on the left side of the page, and it will show a grayed-out state and remove events from the main event listing when filtered off. (This is just a filter tool, so these events will still appear in your app if you've added a calendar feature.)
Click the calendar again to make the events within it visible.
Share Your Calendar Outside the App
Your created calendar can now be shared outside the system! To do this, go to the App > Calendar page in your portal and click the pencil icon of the calendar you'd like to share. If the calendar was created in the portal (not an external calendar), you will see a green Copy iCal URL button. Click that button to copy the link to your clipboard. You can now paste it to any application that supports iCalendar (or "ICS feeds"). Most websites, personal calendars, and other systems support this format.
*Note: Linked calendars using Tags are not yet supported
Add Calendars to Your App
Once you've added or created Calendars/Events in your portal, It's easy to add them to your app. Go to the App > Features + Content page in your portal. Either add an Events feature or hover over one you've already added.
Click the Edit Content button at the bottom of the feature tile. You are now in your Calendar Feed.
Click the + Add Calendar button at the top of your screen, and a window will appear. This list will include all of the calendars you've managed under the App > Calendar page, whether you've created them within FACTS or linked an external calendar.
Select all the calendars you’d like to appear in-app and click Save. Events for all of the calendars listed will appear inside the app. If you need to remove a calendar from the app after you’ve added it, click the X next to the calendar listing.
You can also select which calendar style you want from the right panel toggle.
If you have any questions or need help, send us a note at communitysupport@factsmgt.com!
Comments
0 comments
Article is closed for comments.