
Import profile contact information into your admin portal to quickly and easily send outbound text messages, add individuals to tags, and add custom field information!
Import People
1. To import a list of individuals, click your organization's name at the top left of your portal, then select Data Import.
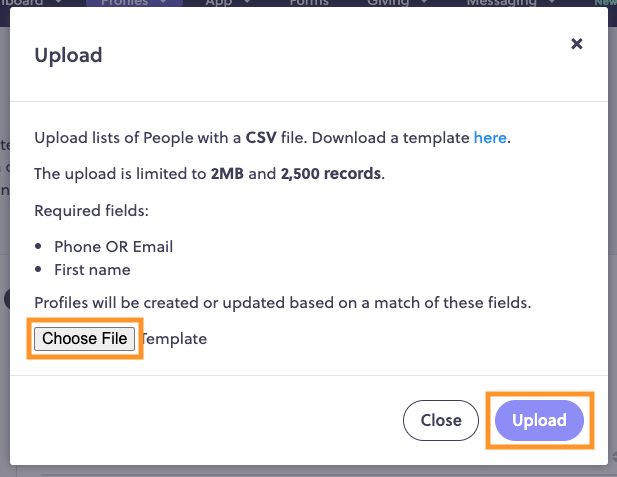
2. On the People Profiles tile, click the Download Template link. This puts a .csv template into your downloads folder.
3. Open the template in a spreadsheet program (like Excel), and enter the appropriate information into each column. Fill in one row per profile and leave the header row from the original template.
*NOTE: For a successful upload, your .csv file must have the following fields completed: Phone OR Email, and First Name. If you do not have an email address or phone number to enter for an individual, you can enter all twos in raw phone number format (e.g., 2232222222) instead. The platform doesn't allow fake numbers which start with a 1 or 0.
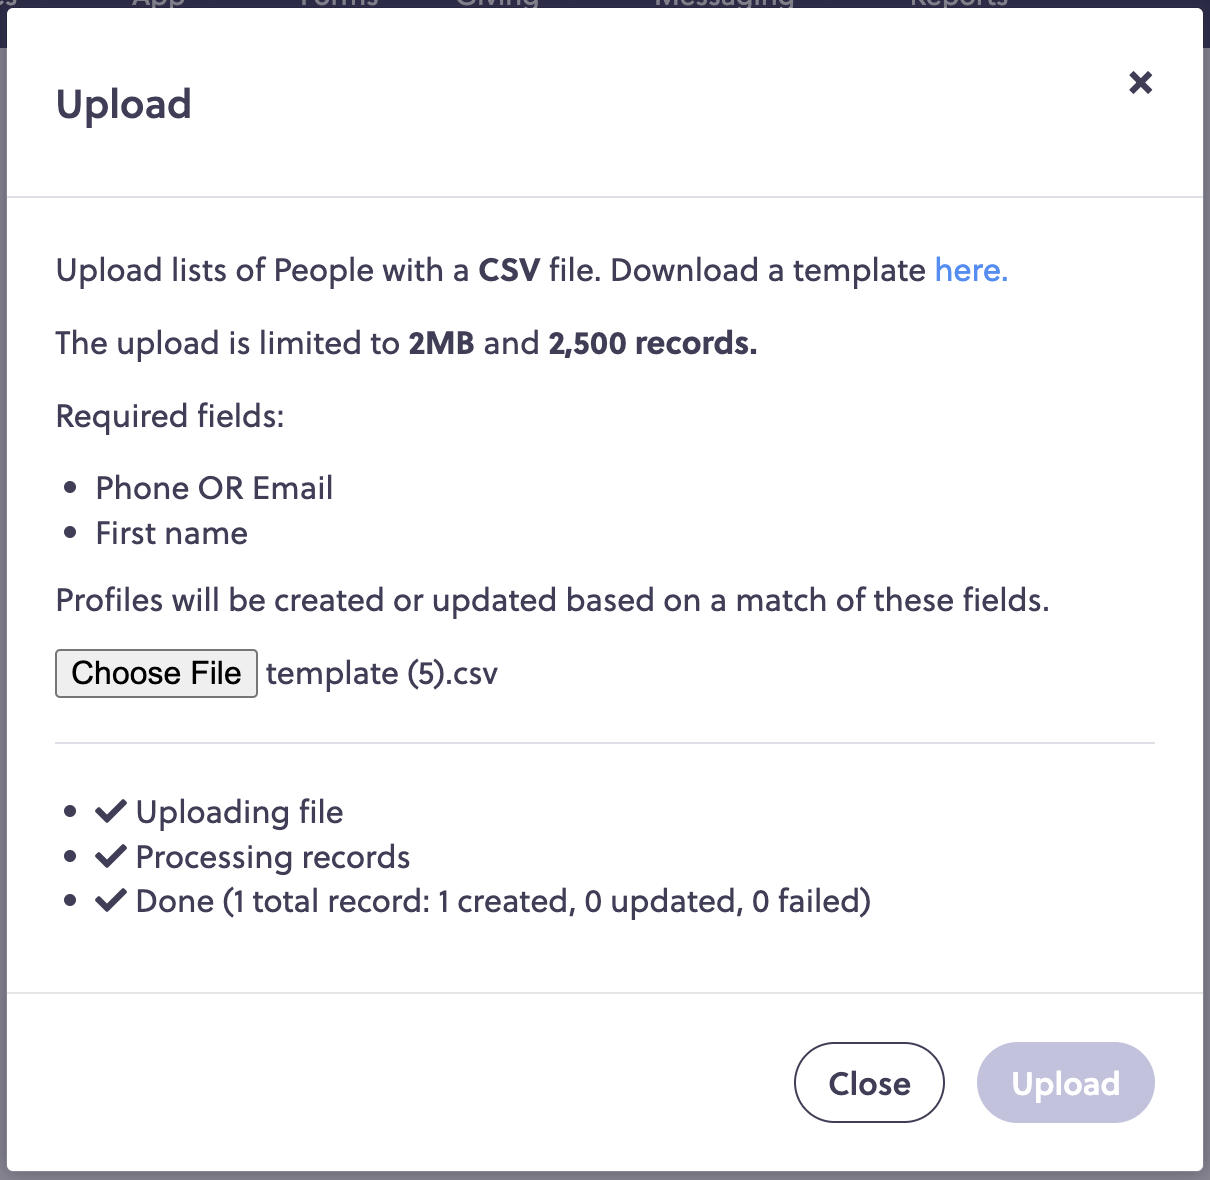
After entering the profile contact information into the .csv file, click the purple Start Import button on the tile titled People Profiles. Click the Choose File option to upload your .csv file. Then click the Upload button.
*NOTE: For a successful upload, the Created and Modified Dates must be in ISO-8601 format (i.e. 2022-06-01T12:00:00-06:00).
*NOTE: If you use Excel your file should be a .csv file, but if you use a different spreadsheet program, you may have to export the file to a .csv file.
4. The portal will import your .csv file immediately and show the progress and completion of the import in real-time. Once completed, you will be able to see the total # of records imported, the # of records created, the # of records updated, and the # of records that failed to import.
Now you can easily schedule a text message, add members to specific tags and fill out custom field information for these newly added profiles within your admin portal!
Add Custom Fields
Does the downloaded template not have all of the fields you are needing? No worries, we have you covered. You can add a custom field to your current template with just a few steps as outlined below.
First, you must add the custom fields to the profiles. You can find detailed instructions for that, here:
https://support.FACTS.com/hc/en-us/articles/360046259452-Managing-Your-People
Here is an example of six different custom fields added to the profile in the portal:
Once you have added custom fields to profiles in your portal, they can be added to the import template.
- Open the downloaded profile import template.
- At the end of the existing columns, add a column for each custom field you would like to import. The first line of each custom field column must contain the custom field title and must be an exact match of the custom field name defined in the portal, such as “T-Shirt Size” or “Graduation Date”.
- The data contained in the rows of the import file must match the type of the custom field configured in the portal (Text, Date, or Yes/No). If the data type does not match, such as the value “abcd” for a custom field created with a date type field, the data will not be imported. Dates for custom fields should be in yyyy-mm-dd format.
In the screenshot below, Columns U through Z are all examples of what you might see in an import file with custom fields.
Now you can import data with your custom field and that information will be housed in your members profiles under Custom Fields. This is a great way to add in fields that are unique to your organizations needs and customize a user's personal information.
If you have any questions or need help, send us a note at communitysupport@factsmgt.com!
Comments
0 comments
Article is closed for comments.